
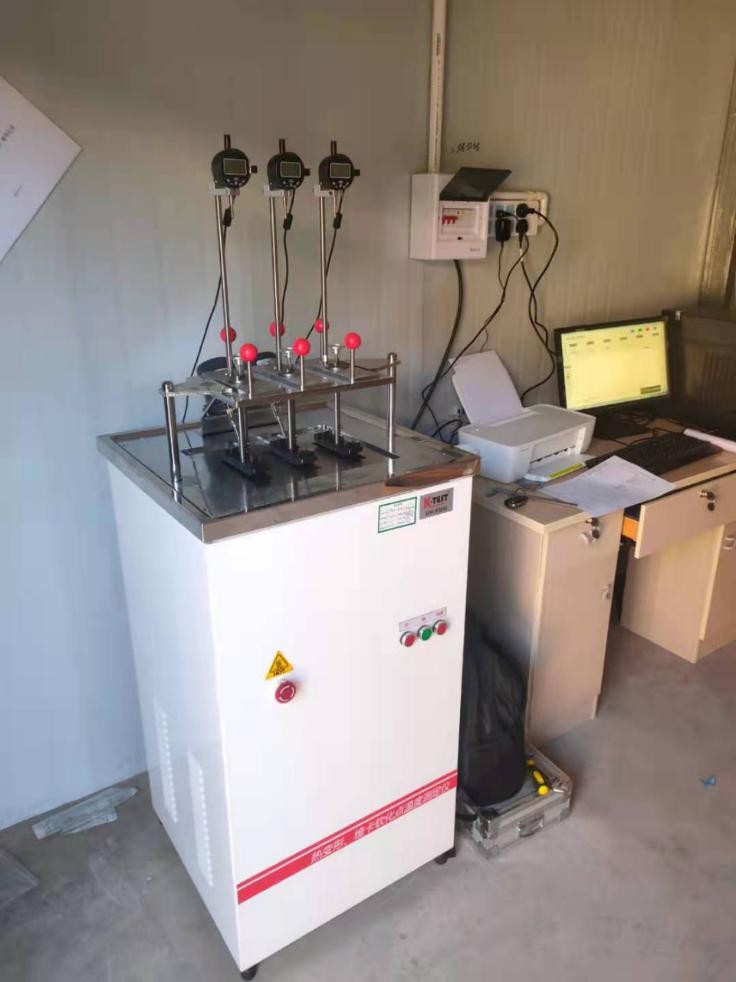
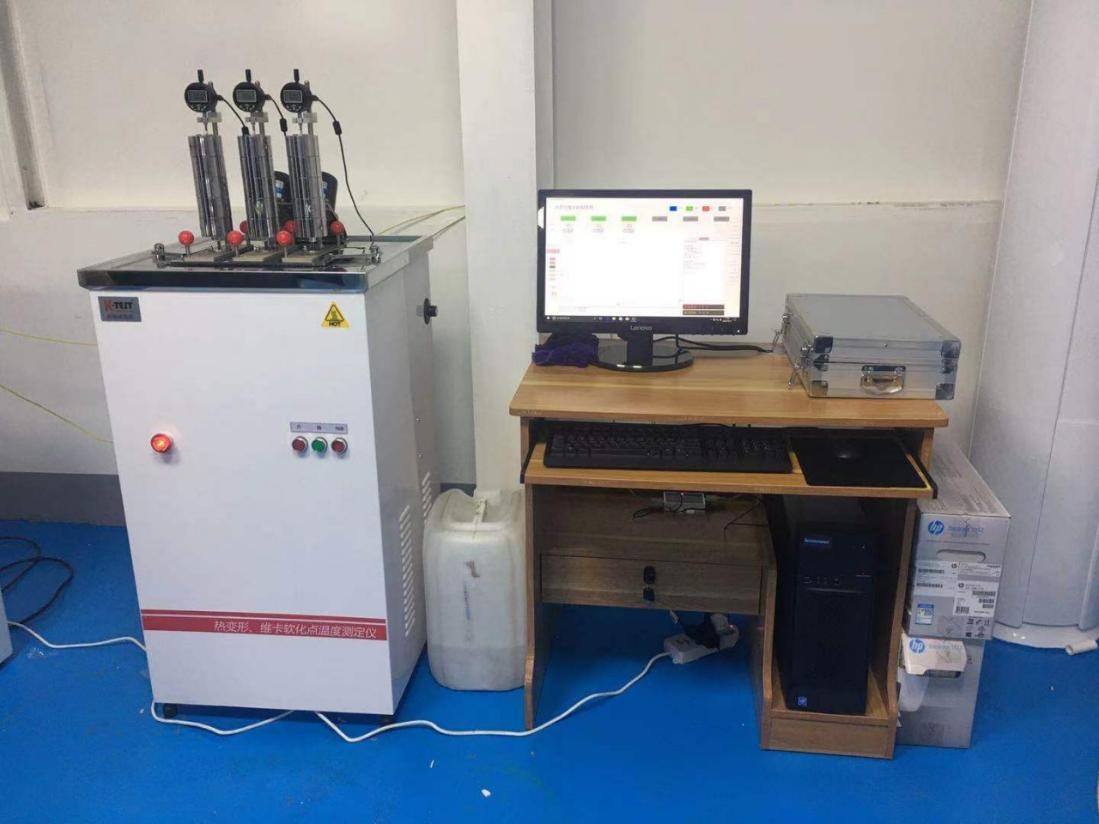
KBRW-300CL-3B Heat Deformation and Vicat Softening Temperature Tester
Overview
It is mainly used for the determination of the heat distortion temperature and Vicat softening point of non-metallic materials such as plastics, hard rubber, nylon, electrical insulating materials, long fiber reinforced composites, and high-strength thermosetting laminates. The operation is convenient and the control is precise. It is a highly intelligent testing instrument and is widely used in colleges and universities, research institutions and product quality supervision and inspection units.
Comply with standards
Complies with the requirements of standards such as GB/T 1633, GB/T 8802, GB/T 1634,ISO 2507, ISO 75, ISO 306, ASTMD 1525, and ASTMD 648.
Instrument features
Test stand lifting system The automatic lifting and lowering function of the test stand greatly facilitates the operation of the test, improves the test efficiency and avoids personal injury.
Advanced control system
It features ultra-high stability and is easier to install, test and analyze.
User-friendly software control system
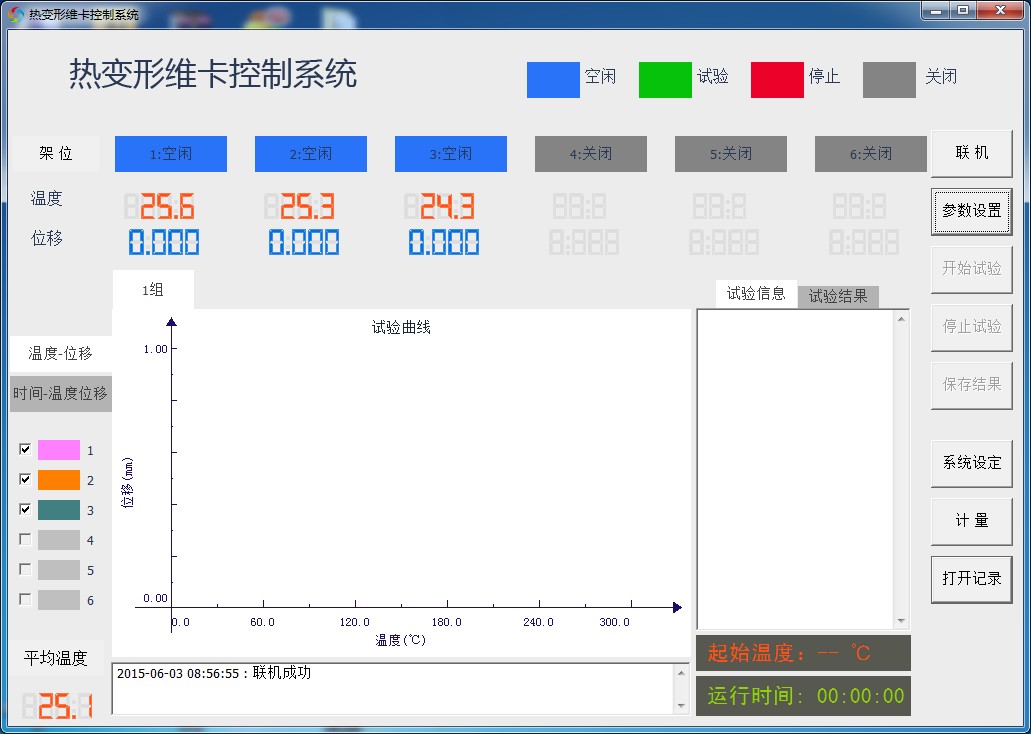
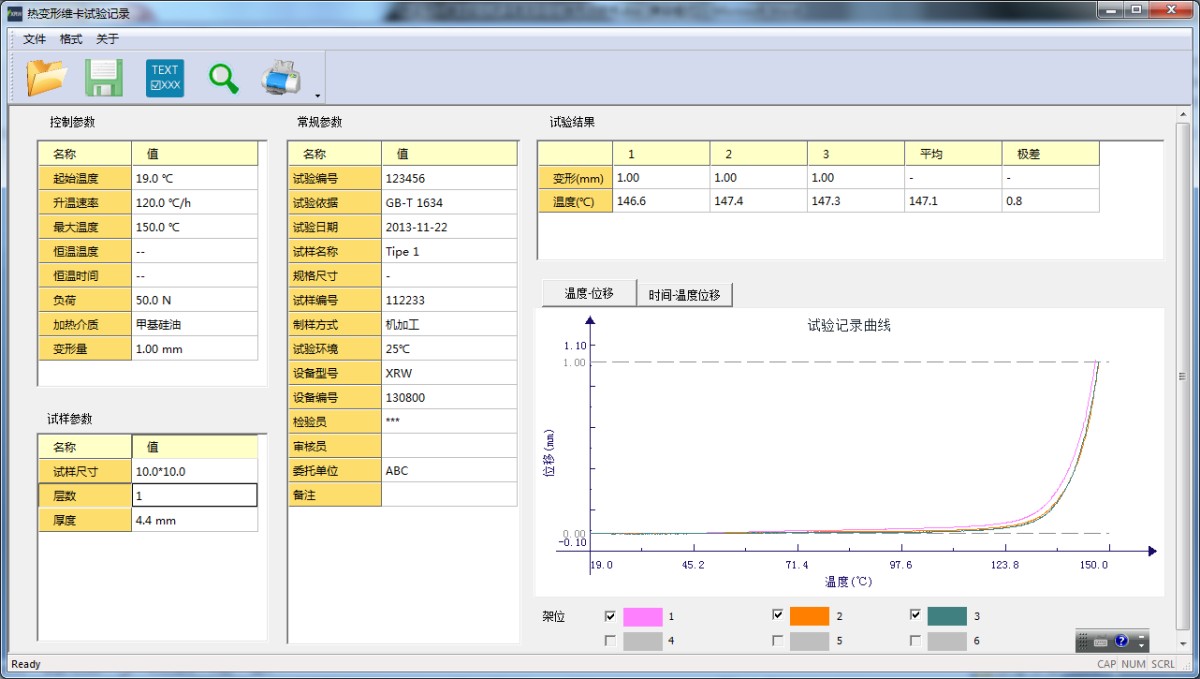
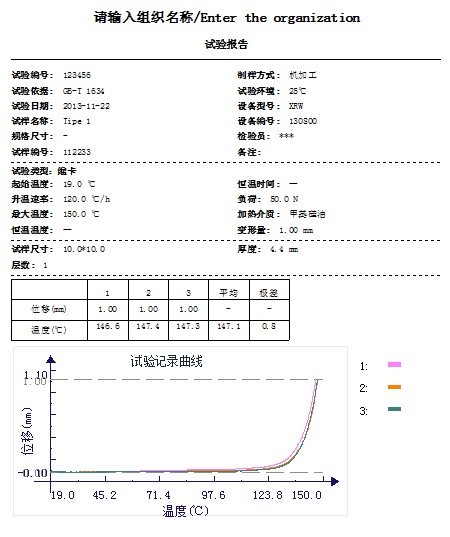
The temperature and displacement are displayed in a digital tube-like manner, and the test curves are plotted. Multiple coordinate curves are provided for centralized management of data. It can analyze the test data, print the test curves, test data and test reports.
Fourfold safety protection
Multiple safety designs, including mechanical upper temperature limit protection switch, software upper temperature limit protection, automatic stop upon test completion, and administrator operation key, ensure the safe and stable operation of the test.
High-precision measurement and control system High-performance temperature sensors and advanced capacitive digital dial indicators are used to accurately measure the minute changes of the samples. Advanced PID algorithms and fully optically isolated phase-shift modules are adopted for temperature rise control, ensuring that the temperature rise rate error is within 0.5℃.
Technical parameters
Ø 1.Ramp rate: adjustable from 50 ± 5°C/h to 120 ± 10°C/h at will
Ø 2.The number of test specimens: Three groups of components can be tested simultaneously.
Ø 3.Deformation measurement device: dial indicator with a resolution of 0.01mm and an accuracy of 0.001mm.
Ø 4.Overall dimensions (length × width × height, mm): approximately 770 × 350 × 630
Ø 5.Power supply: AC 380V, 1.5kW
Ø 6.Weight: Approximately 80kg
Ø 7.Temperature accuracy: 0.2 grade
Ø 8.Temperature control range: Room temperature to 300℃
Ø 9.Temperature measurement point: 1;
Ø 10.Deformation measurement range: -0.1 to 10 mm;
Ø 11.Maximum deformation error: ±0.005mm;
Ø 12.Deformation resolution: 0.001mm;
Ø 13.Sample support span: 64mm, 100mm;
Ø 14It features both software upper temperature protection and hardware upper temperature protection (the temperature switch is imported from South Korea with a current of 30A, not a fake protection. The heating power is 4000W, which can ensure a temperature rise of 120℃/h to 300 degrees).;
Ø 15.The sample holder can be automatically raised and lowered. The coefficient of thermal expansion of the sample holder itself is less than 0.005/100℃ (key point, directly affecting the experimental results).;
Ø 16.The control mode adopts a distributed control system composed of a single-chip microcomputer and a PC.
Ø 17.It is equipped with an automatic lifting system for the sample holder.
Ø 18.Medium used: Methyl silicone oil or transformer oil;
Ø 19.Cooling method: Natural cooling above 150℃, water cooling or natural cooling below 150℃
Configuration
Test software:
If you are interested in our products, please fill in the message below to contact us and get a quote!
We will get back to you as soon as possible!
Type What You are Looking for
